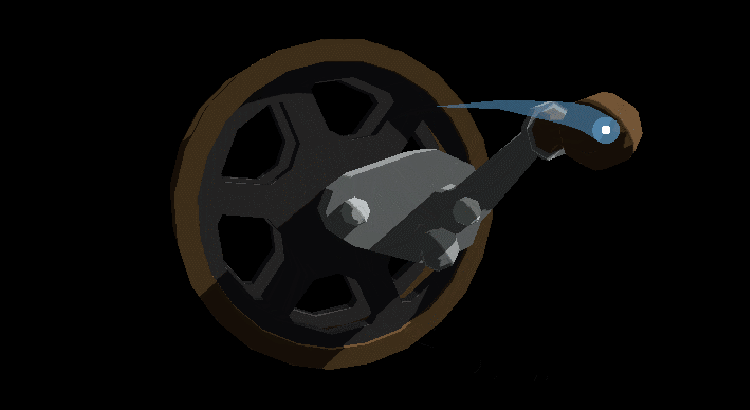
Happy belated new year! Busying myself with lots of different bits and bobs at the moment but will hopefully be sharing more info on the second Toryansé short pretty soon. In the meantime I thought I’d share a few notes on making a player-rotatable handle in Unity using Playmaker; it turned out to be a bit trickier than I imagined…
Having a rotatable handle in my game isn’t essential but, a bit like with the washing line, once I had the notion in my head it was difficult to move on from until I had one working properly.
My first approach involved using an invisible plane to detect a ray-cast from the cursor, on mouse click the handle would look at the hit-position, which looked the part, but any rotations over 180° would actually flip over rather than adding up. After struggling for a while I ended up attaching a couple of colliders that always rotated away from the mouse which also worked to an extent and, because it happened in distinct steps, I could easily count the rotations in either direction, it wasn’t particularly reliable though and it was really easy to accidentally trigger the wrong direction.
Thankfully, a couple of helpful folks popped up in the replies on Twitter including @JeanAtPlayMaker, whose advice was not to rely on the object’s rotation itself but instead to use the signed delta angle. After some searching around and a bit more head scratching I found a Get Signed Angle to Target action on the Playmaker forum and started again…
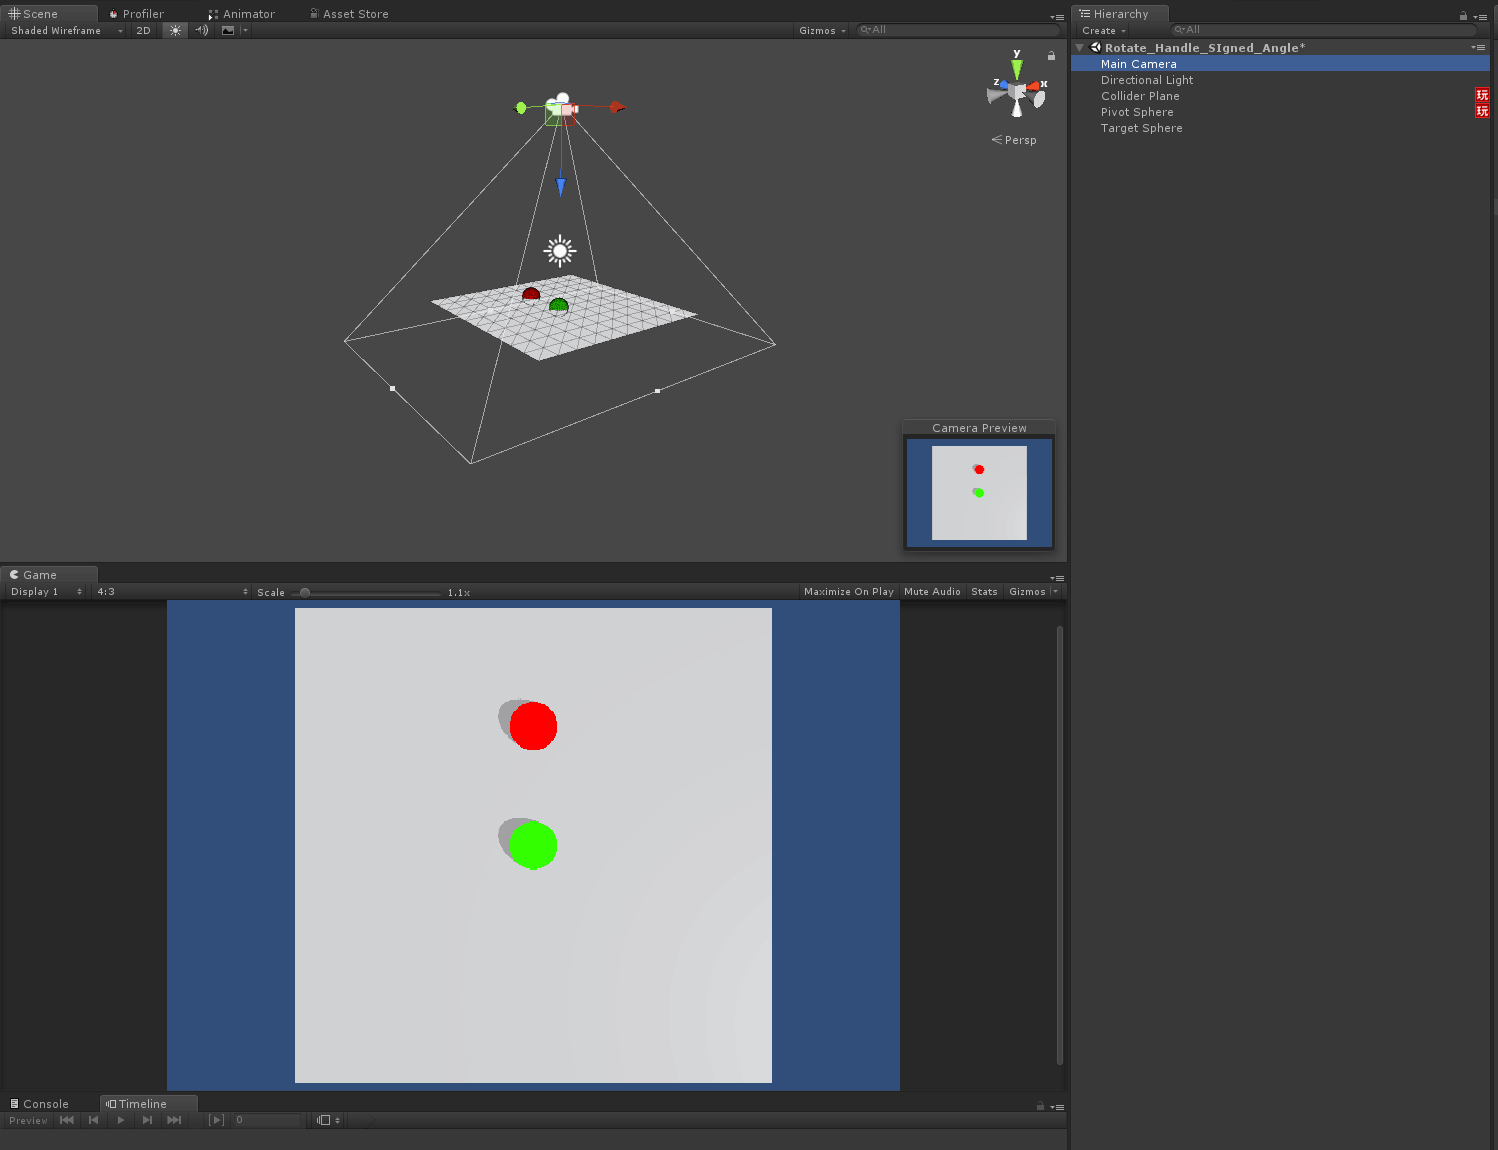
So, in an empty scene, create a plane and two spheres, make sure all transforms are at zero, then move one of the spheres 2.5 in the z-axis, this will be the Target Sphere (red in the image below), I’ve named the other objects Pivot Sphere (green) and Collider Plane…
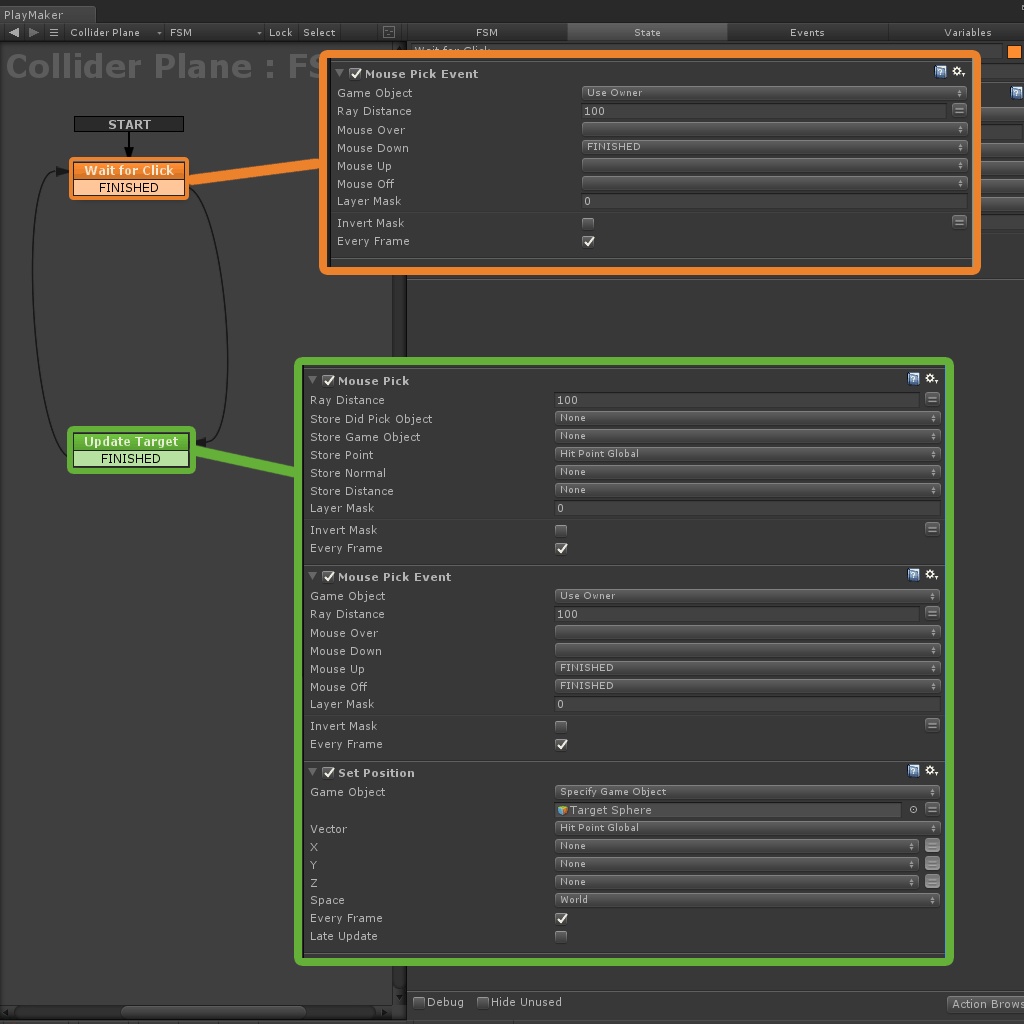
Disable/remove the colliders on the spheres so they don’t get in the way but make sure the Collider Plane still has one, create an FSM on it…
The first state simply waits for a mouse click, the second records the hit point of the click as a Vector 3 (Hit Point Global) and updates the position of the Target Sphere to match. The second state also detects mouse-up and goes back to the first state.
Create an FSM on Pivot Sphere and add three float variables: Signed Angle to Target, Total Float and Corrected Float.
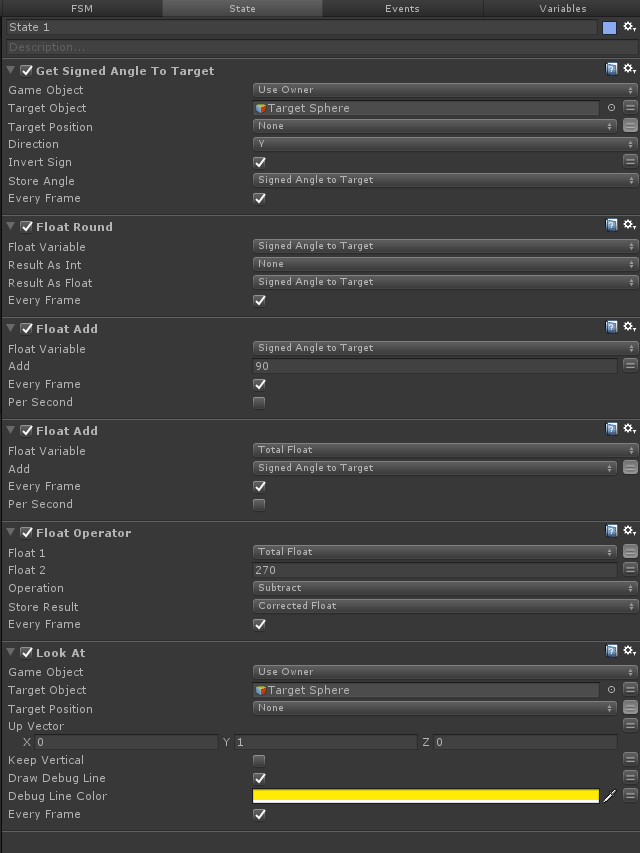
This looks a bit complicated and I’m probably over-engineering out of ignorance, it seems to work reliably enough though!
The Get Signed Angle action is getting the angle between the Pivot Sphere and our Target Sphere including whether that difference is positive or negative based on the direction.
The second Float Add action is adding this difference to the Total Float so we can keep track of the entire number of degrees rotated, then the Look At action is rotating the Pivot Sphere to face the Target Sphere again, effectively reducing the difference back to zero every frame.
The other actions are there to correct the confusing discrepancies that seem to pop up! The Float Round action is there to remove any tiny close-to-zero numbers that can appear when using Look At, as we’re adding the angle on every frame, even the smallest difference will quickly mount up. The other Float Add and Float Op are needed in this specific case to produce a final Corrected Float of zero; depending on how your final objects are arranged and related these will vary.
Expose the floats in the inspector and run the scene, what you want to see are steady numbers that don’t increase on their own every frame and a Corrected Float of zero that will increase to 360 if you draw a circle with your mouse.
Once you have a reliable number coming out of your handle you can use it to drive all sorts of other things; the set-up above will give you whole degrees but by using the output of an Inverse Lerp as the input for a normal Lerp you can convert this to whatever you want…
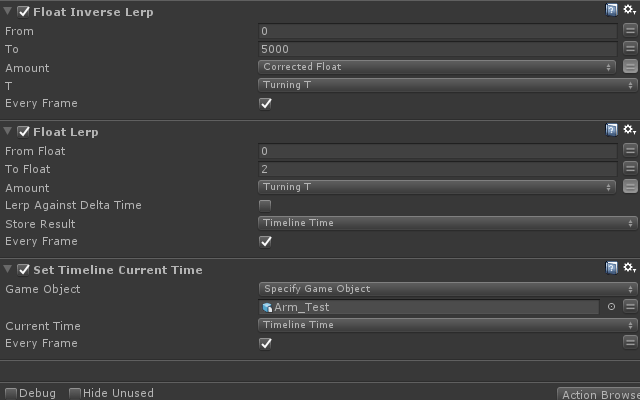
In this example I have it so that rotating the handle 5000° clockwise will move the timeline on 2 seconds…

Once that’s working you can then use this set-up to control all sorts, here I’m scrubbing through an animation clip, setting rotation on the wheel, cycling the colour on a material and updating text.
Thanks to @JeanAtPlayMaker and @gsmetzer for their help and to pedroathumanspot on the Playmaker forums for making the Signed Angle action!
As ever, if you have any questions, crits or corrections, leave them in the comments below.
You can also follow along on Twitter for more regular updates.

