Aspect ratio isn’t something that can be set directly but it’s helpful if you have a large number of resolution options you want to narrow down.
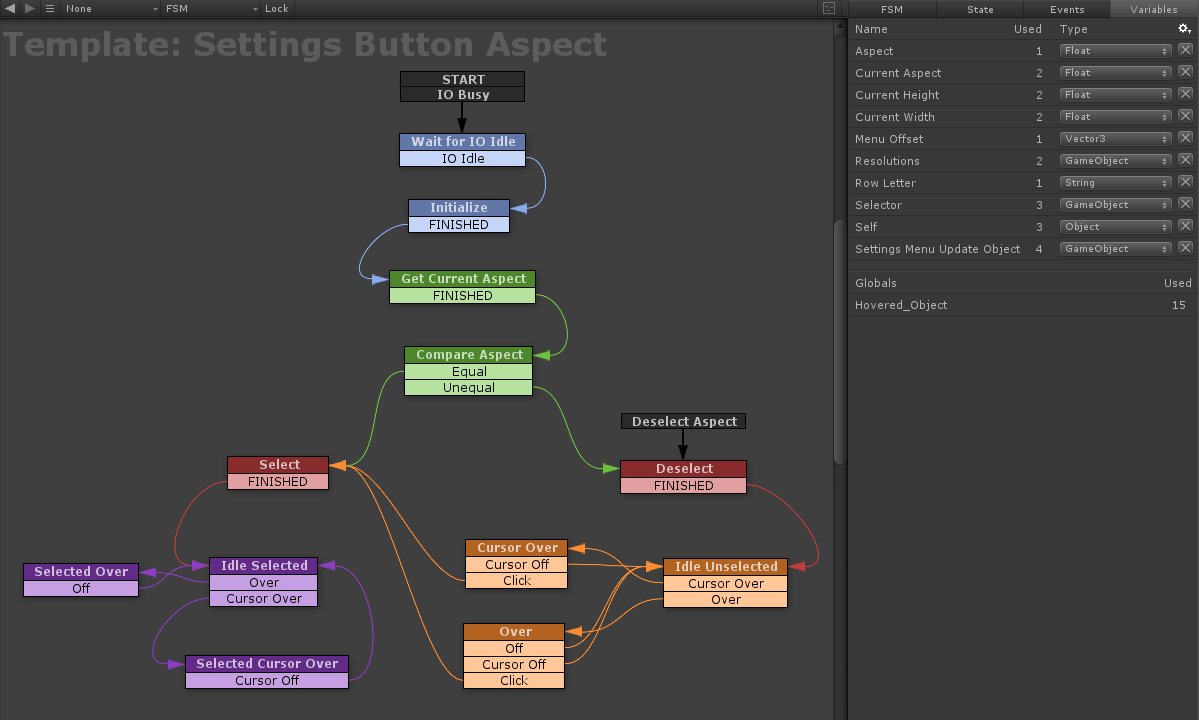
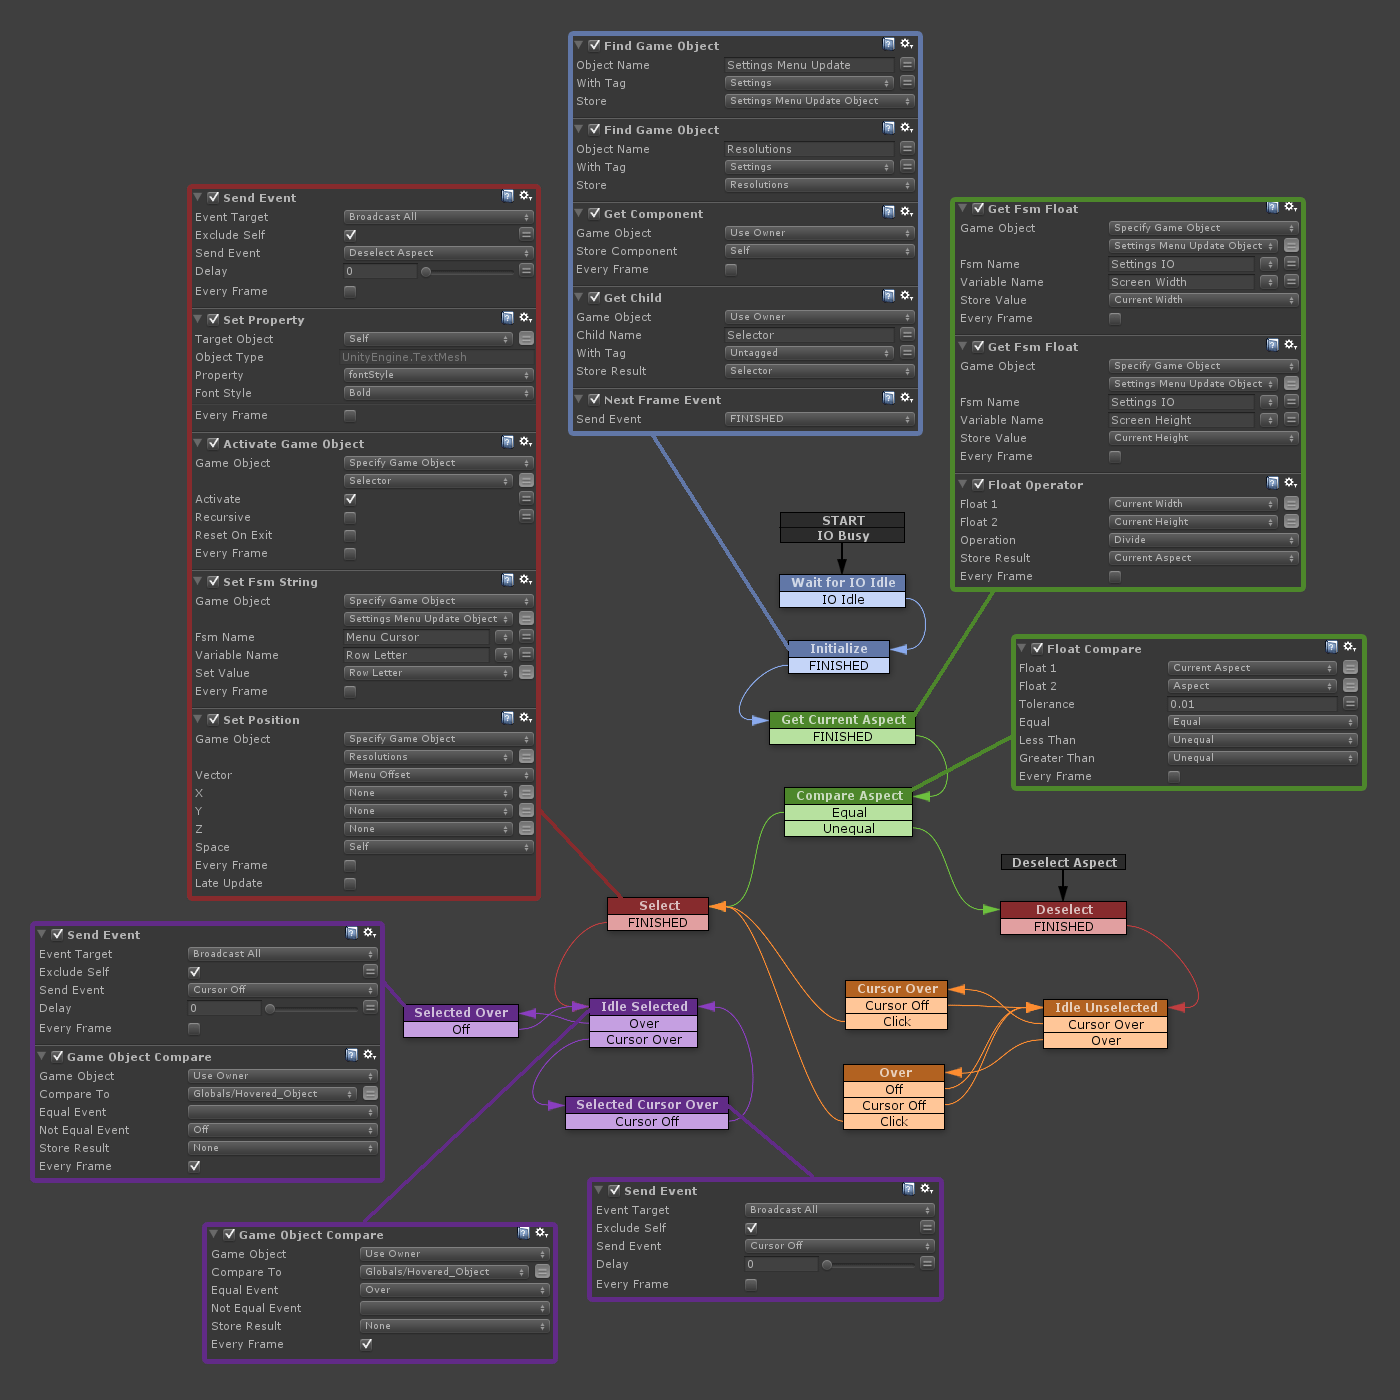
The Aspect FSM keeps track of all the same objects and values the resolution button did plus Selector, a blue quad which is the child of the owner button, and Resolution, a Game Object which is parent of all the resolution buttons. When an Aspect is selected it translates the Resolutions object left or right to show only those buttons that match the relevant ratio, effectively creating three sub-menus on the same row.
Rather than have a separate aspect variable associated with each and every resolution, it’s simpler to just work it out on the fly and store the result, this also makes it a bit quicker to add new resolutions later on. We get the Screen Width and Screen Height values from Settings IO, and divide the former by the latter, the resultant float Current Aspect is compared to the local Aspect. Selection works as before but additionally, activates or deactivates the Selector quad, sets a string value in the Menu Cursor FSM and moves the Resolution object to a preset position.
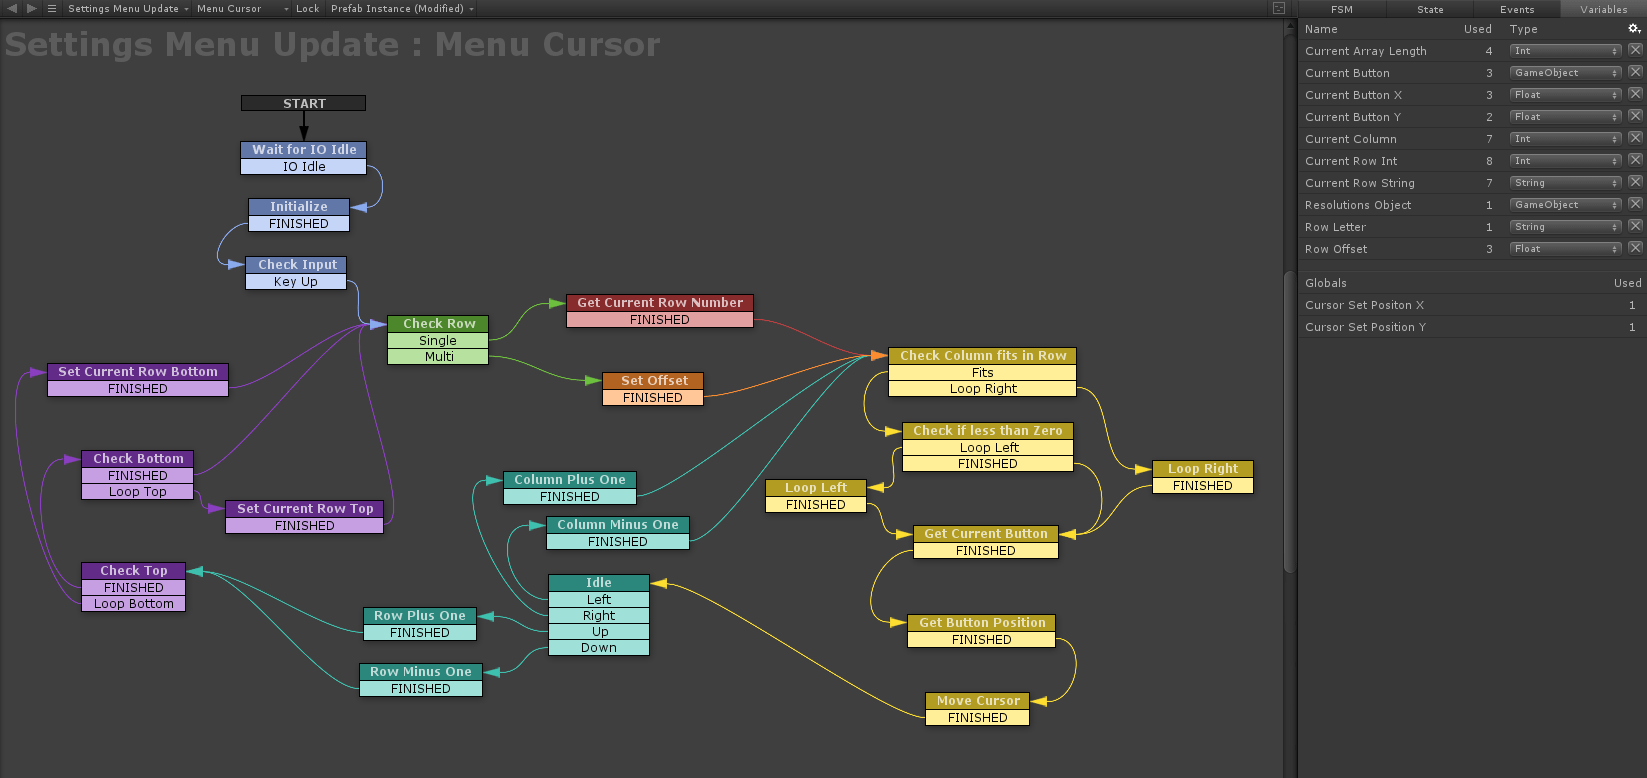
The Menu Cursor FSM handles non-mouse input, it keeps track of button positions and places the cursor accordingly based on input, I’m just using keys at this stage but the principals should remain the same regardless. Each row of buttons is stored in an Array List Proxy on the Settings Menu Update object, each entry in the array represents a single button and column.
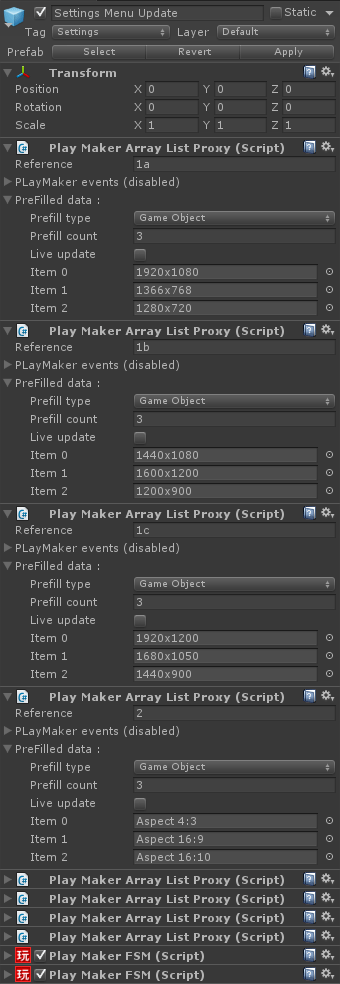
The arrays are all labelled with a number, those containing resolutions also get a letter. This letter is just a short way of referencing the three different aspect ratio sub-menus. I haven’t shown them all, but array #3 has just the Fullscreen button in it, #4 just Apply, #5 is V-sync and #6 the AA-levels.
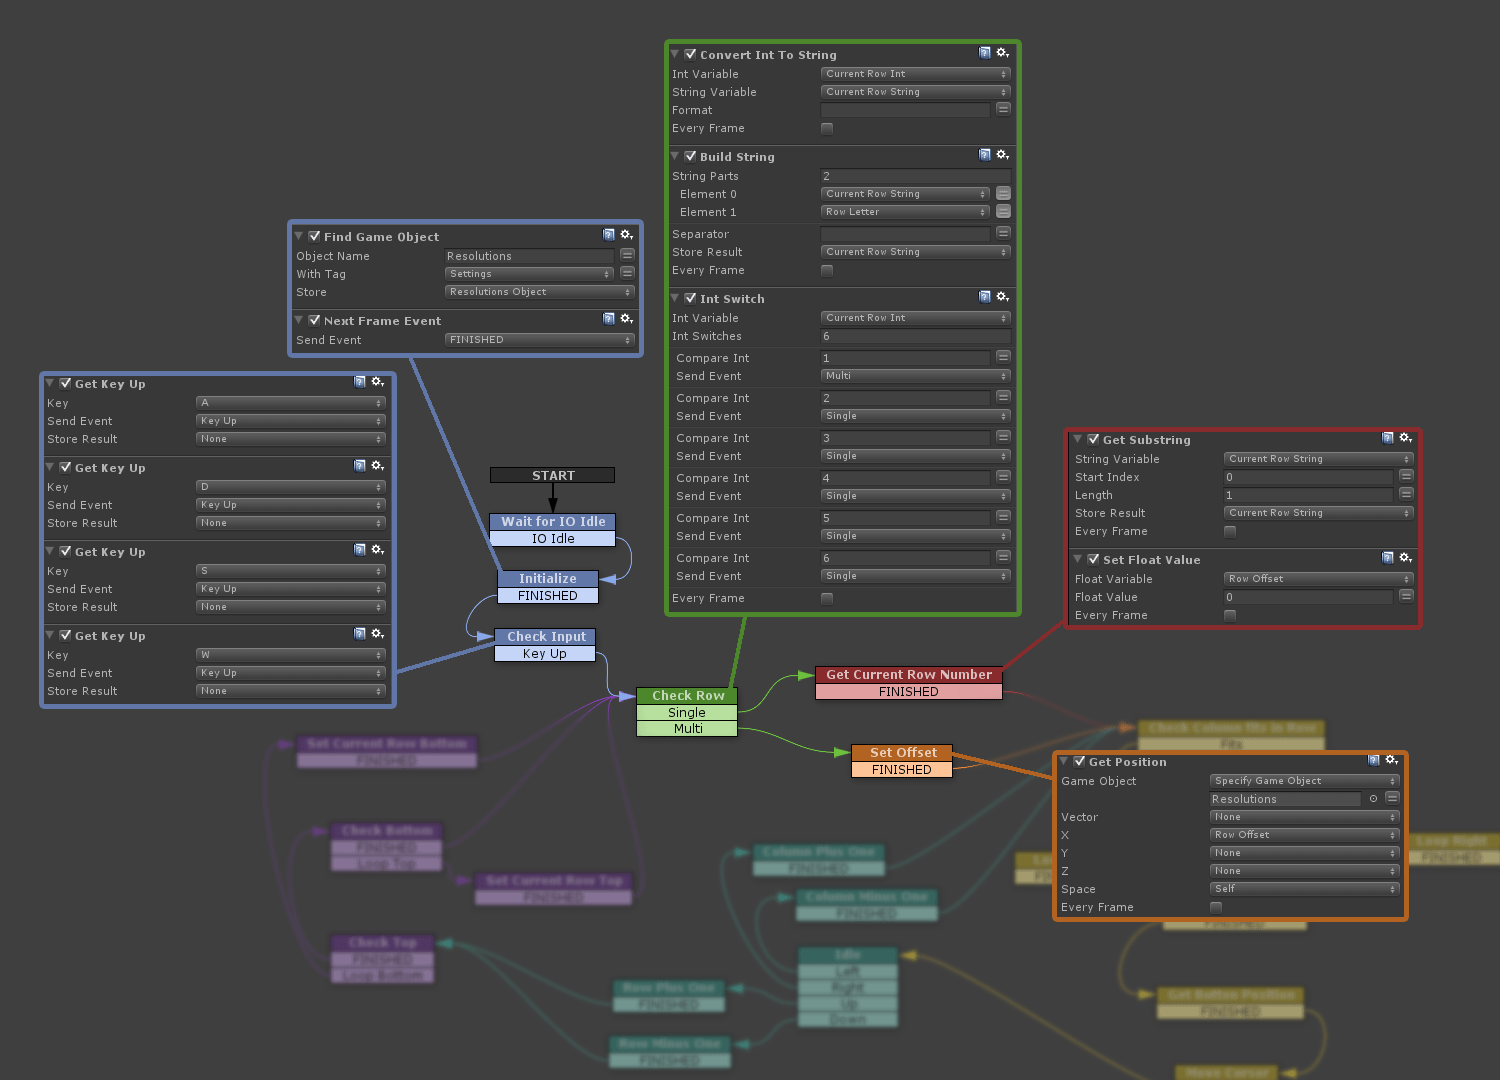
We only use this system with non-mouse input so after Initialize, we wait for a Key Up event on WASD in Check Input. The arrays all have numbers to identify them but Array List actions require a string for reference so we need to store the Current Row integer as a string as well. The resolution buttons are spilt into sub menus depending on aspect ratio, each has its own letter, but they all effectively inhabit the same row (I’m calling this kind of row a Multi), the row letter is added on to the Current Row String but it’s only the Current Row Int that’s used for the switch. All the Single rows behave the same way and don’t require an offset so we can set it to zero, we can ignore the Row Letter for these rows as well so only the fist character of Current Row String is required.
Our sole Multi row, the resolutions, requires an offset because it’s shifted left or right depending on the current aspect ratio. The translation is performed on the parent object Resolutions but here we’re getting the individual button positions from their Self space, so we just have to offset by the same amount we moved the parent.
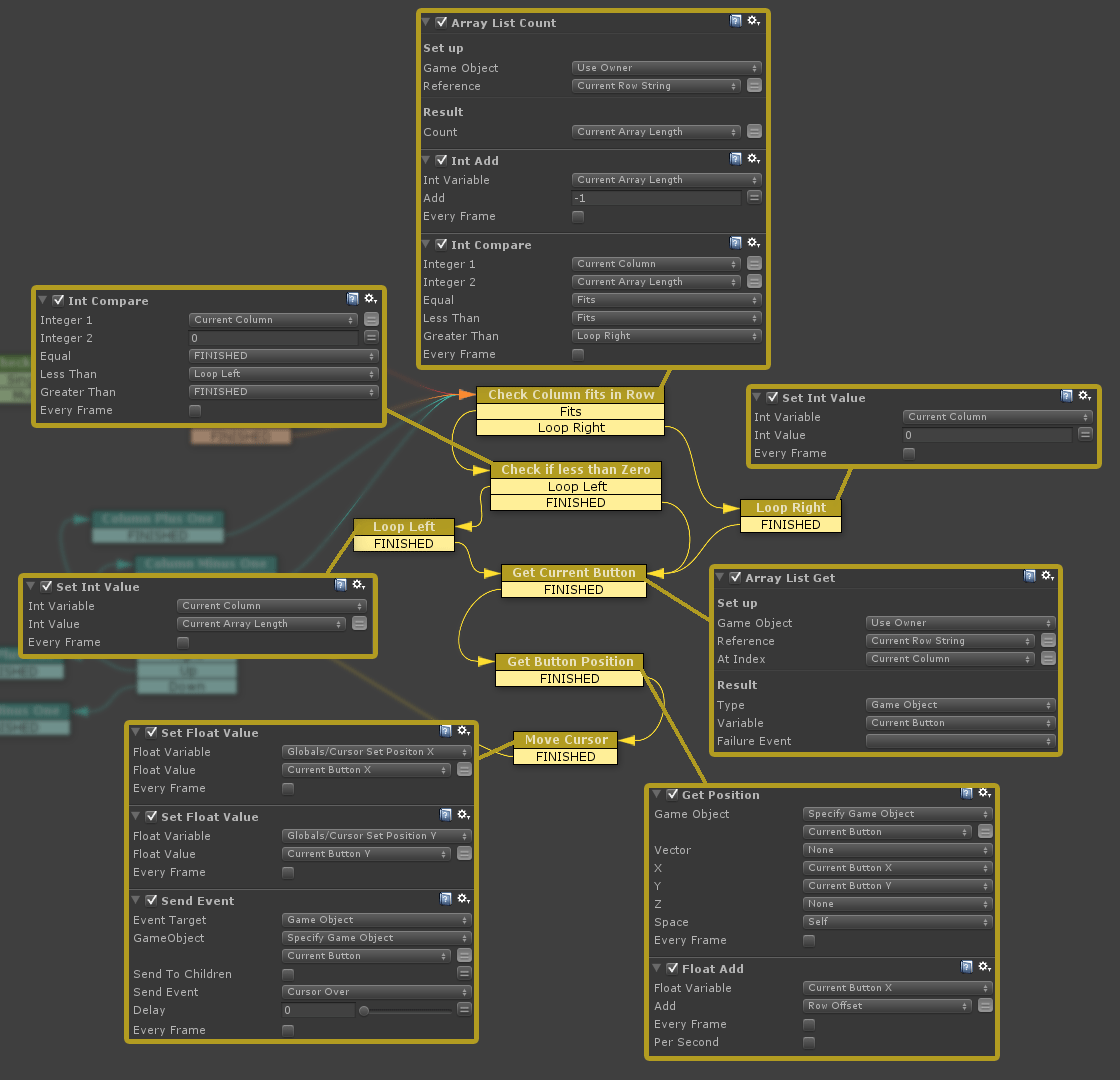
Once the offset is figured out all the rows work the same way, Check Column Fits in Row uses the Current Row String as a reference and makes sure the Current Column is no higher than the last entry in the specified Array List (Arrays start at zero, hence the minus one!), if it is it will Loop Right, jumping back to the first entry, zero. Check if Less than Zero makes sure the Current Column never turns negative but instead will Loop Left, jumping to the last entry in the current array, which will be the same as the Current Array Length (Now already including the minus one!).
Get Current Button uses the Current Row String and Current Column as Reference and Index in an array list get, Get Button Position takes its position and adds any necessary offset, before Move Cursor updates the cursor position and sends the Cursor Over event to the Current Button.
(We haven’t actually set up the actual, visible cursor during this tutorial and you can just leave it out, the button text will still scale up and go bold to indicate which one you have selected, this is just what works with mine. If you wanted to you could add in an extra sphere or sprite or whatever at the same z translation as your buttons, and just pass the Current Button x/y positions to that.)
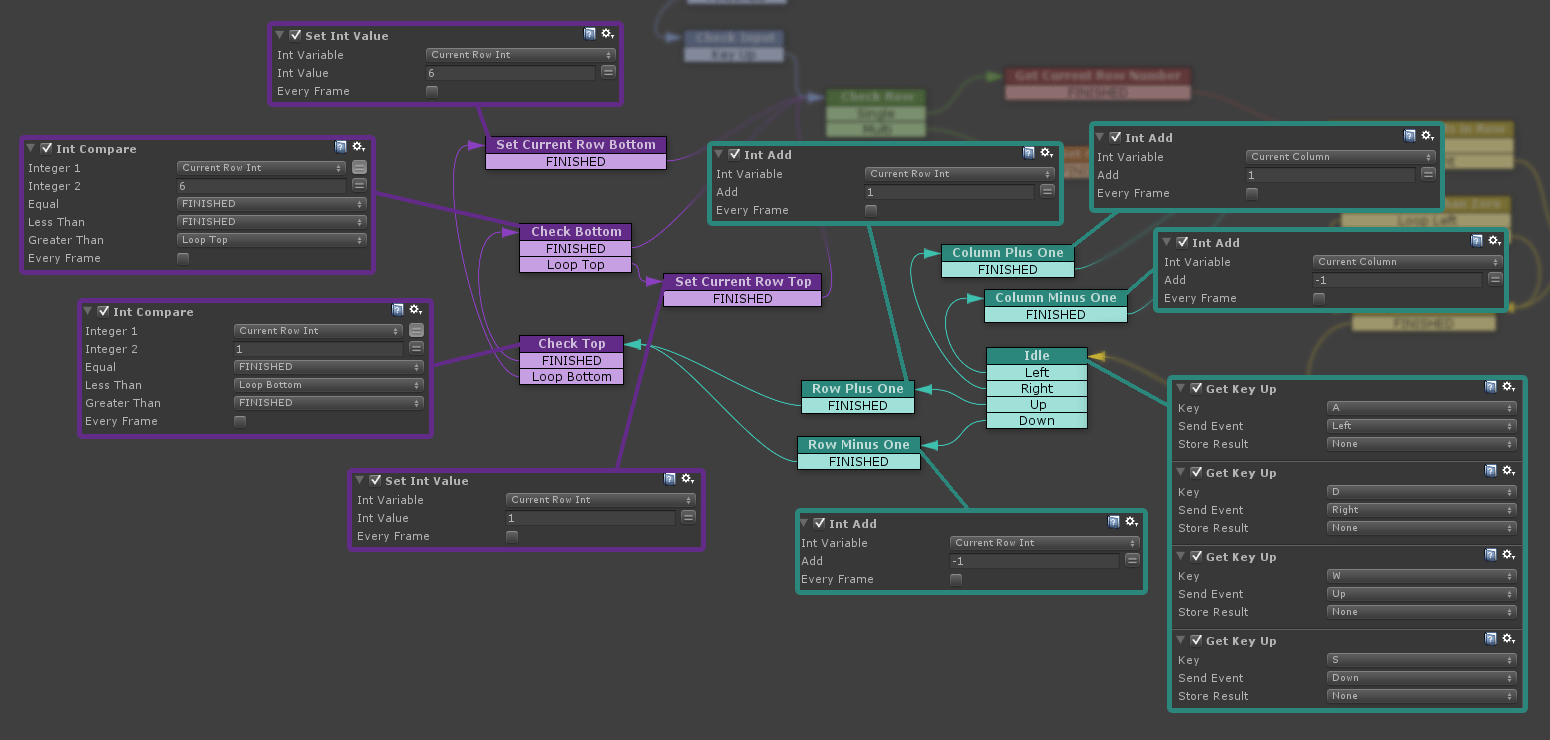
Idle waits for Keys Ups and then either adds or minuses one from Current Row or Current Column, before Check Top and Check Bottom make sure the rows loop just like we did previously with the columns. We finish up back in Check Row and the process starts again.
After all this we still haven’t actually changed any settings, we still need to click the Apply Settings button…

I think i see one of my actions.. so happy
Hey, thanks for all the actions you put together! The v-sync one here is yours I think!? 😀
oh come on dudebxl, you’ve written like HALF the custom actions on ecosystem ;D